Mounting Small Tapestries

Last week I wrote about my pile of weavings I need to mount or get ready to hang.
In the past, I’ve been mounting my small weavings by covering stretcher bars with first a batting, then material, and then stitching the weaving onto the material.
Sometimes it worked. Sometimes it didn’t.
The technique is proven. It was all in the choices I made.
Just when I was contemplating using a new method, Molly Elkind happened to be giving a presentation on… well… presentation! Don’t you just love Serendipity!

Before I go on, I feel it’s important to let you know that if you missed this presentation, you can get on the mailing list at Damascus Fiber Arts School and get a notice of the recording. The fiber school is a non-profit organization; the pandemic has hit them hard. They have a series of fundraiser webinars over the next few weeks and the schedule is on the website. All of this is being offered free of charge, but please consider donating. They are exceptional in quality!
In Molly’s presentation, she showed three ways of presenting (mounting) small tapestries. The first two were just what I’ve been searching for. And the third was my traditional way involving covering the frame.
First, the commercial frame.
I’d thought about this, but what I didn’t know - or hadn’t occurred to me - was that a matt is included in some of the frames, which is a real plus. Apparently it’s a high enough quality, too, which was my other concern. It’s been a long, long time since I’ve cut my own matts- and I have no desire to go back in time!
Of course, there are a couple of drawbacks to this method.
1. I’d have to go out and actually buy the frame. Shop. Covid or pre-Covid, I’m not and have never been a shopper. In my opinion, it’s a real time suck. And I would think a frame would be like choosing yarn. I’d need to see it and hold it in my hands to be sure of the quality.
2. The other drawback is that your weaving size is dependent on the size of the matt. Molly brought up this issue in her talk, saying that she’d begun to think about the presentation before starting the weaving so she could make it fit these frames. I’ve been making a lot of notes over the past month on this very same thought - searching for the perfect frame for the right sized weaving and leaning towards standardizing my sizes.
The beauty of this method, though, is how clean it looks. How finished! I loved that look.
So, for the time being, and these weavings, I’m leaning towards her second method.
Next up, painting the background!
I’ve seen this done on some weavings and have been intrigued, but that’s as far as it went.
A pre-gessoed canvas is painted, then the weaving is stitched onto it. Choosing the paint color to compliment - but not detract from - the weaving is the trick.
This got me excited. I have several of these canvases lying around because I’d tried mounting directly on the canvas (with the added batting and material) in the past. At the time, I found it too hard to push my needle through.
I also had the acrylic paint - or at least the primaries and black and white.
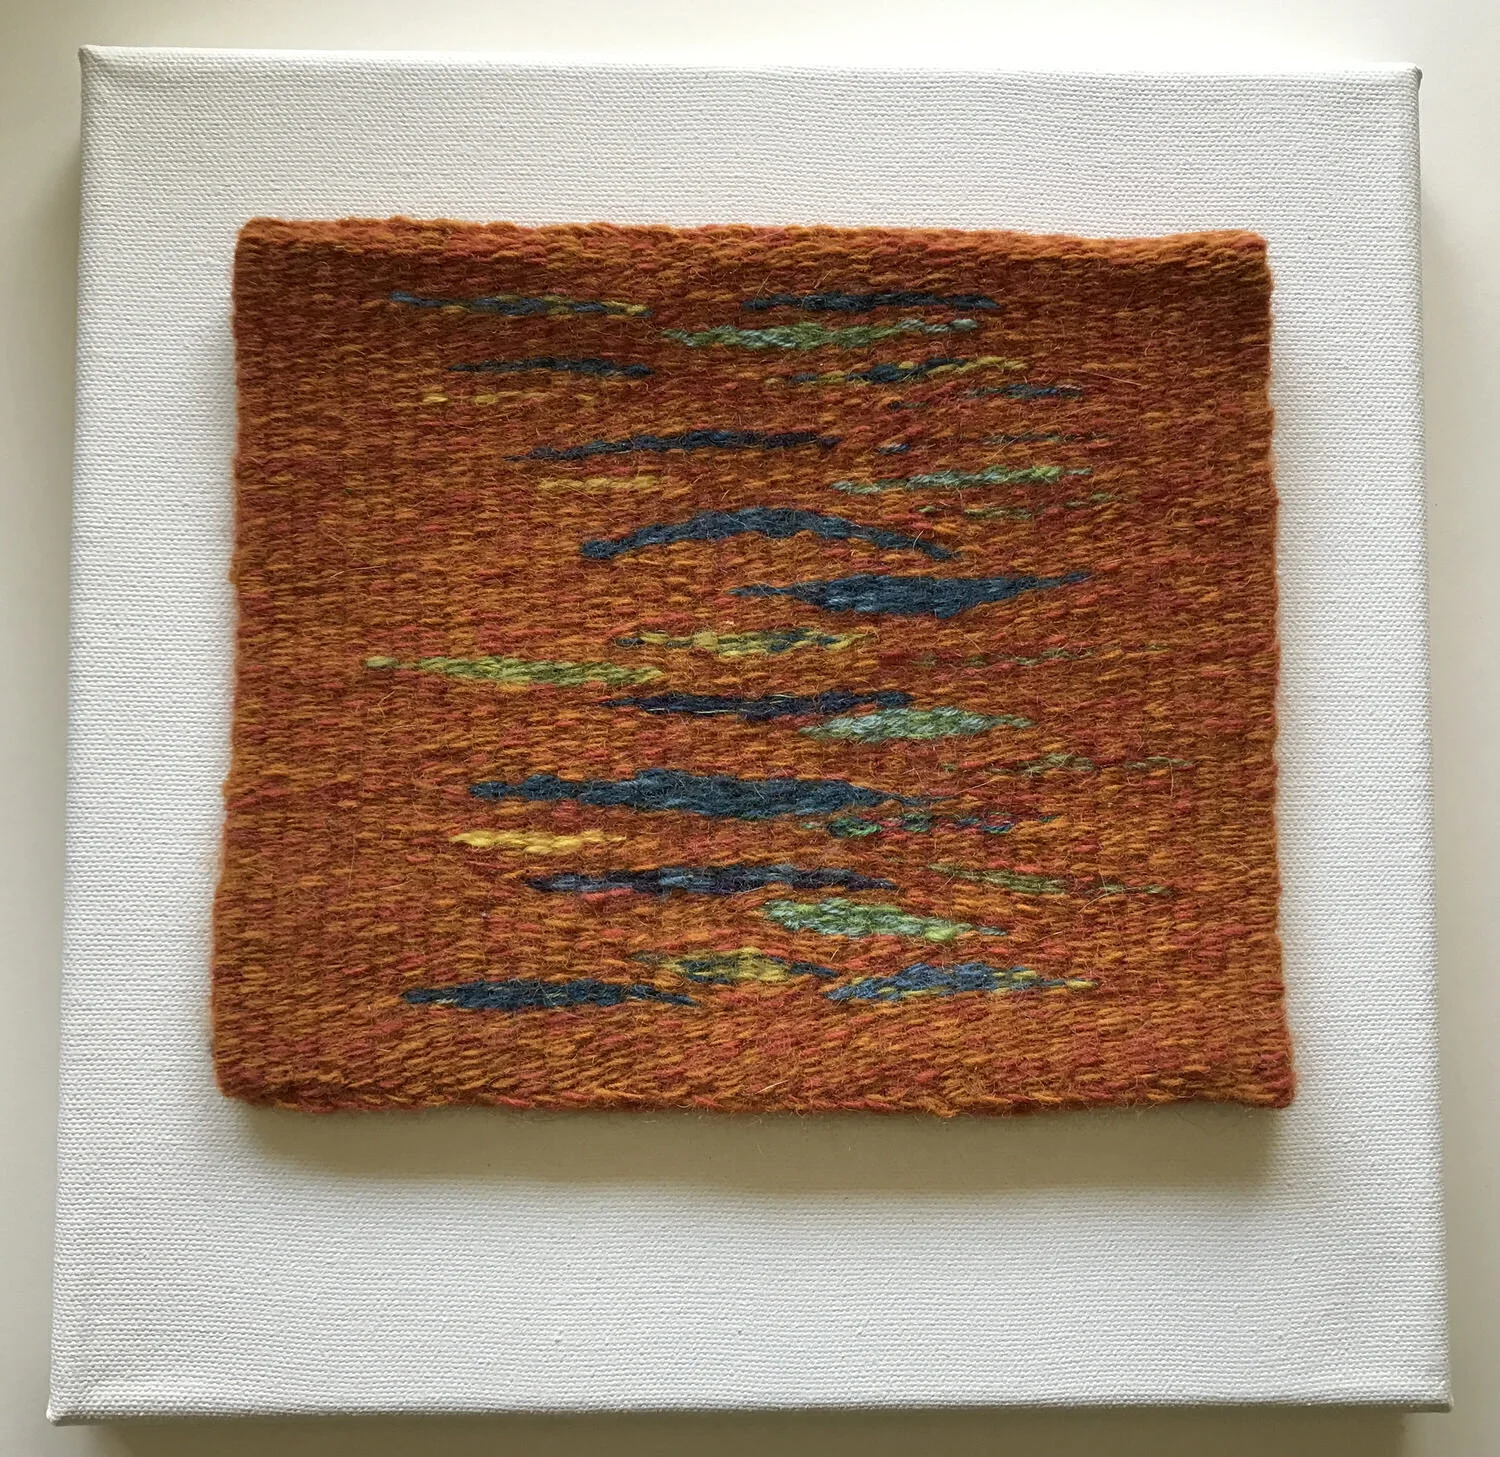
Tapestry sample piece on 10” by 10” canvas
So, I went in search of a tapestry that would fit the size of the (10” by 10”) canvas I had and found one. Ok, first step was easy. Next, I got out my color-aid papers and pulled some that I thought might work. This is truly the hard part! My color-aid papers are quite small (although larger ones can be purchased) so I couldn’t see the color surrounding the entire piece.

Color-aid papers
There was a skein of EPiC yarn lying next to where I was working that looked like a good color choice, so I went from there with pulling primarily blues and greens.

Weaving with color swatches around it.
I photographed the weaving without the colors and also with all the colors around it. I actually photographed a lot more, but have narrowed it down for this post.
Then I turned to Photoshop.
I used Photoshop recently to choose a background color for a tapestry, so decided to give it a try for this project. First I cropped the photo and added a 1000 x 1000 pixel canvas around it.

Using the color picker, I was able to pull out the color of each of my choices and change the background. It’s a start.

Showing the different canvas options in Photoshop
The Photoshop experiment was good, but not ideal. Colors shift with lighting and what I came up with wasn’t always spot on. Pantone makes color papers with hex numbers; could be worth investigating if this method is used a lot- but quite an investment ($$$).
I also want to mention another option. My husband came up with this. Use the paint chips from Sherwin Williams or another paint shop instead of color-aid papers to find the right color, then have them mix a small tester batch. It’s a thought. I don’t know how it would react to the gessoed canvas, so that would need to be tested. Archival quality would need to be researched. Plus it adds another expense- and shopping!
I had hoped to add the finished (painted) project here, but I expect this to take me a while longer to come to a decision…
Which one would you choose?